1st graders are currently studying Asia so we made some panda bears in art class! I began the lesson by sharing a few interesting facts about them and then we watched a short educational Youtube clip about them. I also read the book Zen Shorts because it features a very wise panda bear. For the first day of the project students got a bright red paper for their background. Then, they were given a sheet of black paper to draw a big hill for their panda bears body. This was then glued down to the bottom of their red paper. Next, students cut a a large circle from a piece of white paper to glue down for their panda's head. A smaller piece of black paper was handed out to cut out half circles for their panda's ears. The next day students added black ovals for eye spots and eyeballs. A white tummy was added and then little black arms. A Sharpie was used to make black dots in the eyes and a mouth. The last day was used to make bamboo for their panda. Long strips of light green paper were glued to their background. They even got to add a smaller piece in the panda's hand if they wanted. Little dark green leaves were added and then a green oil pastel was used to draw lines on their bamboo.
Wednesday, March 29, 2017
Australian Koala Bears
Kindergarten is currently studying Australia so I thought it was fitting that we create some cute and cuddly koala bears. I started the lesson by sharing some interesting facts about koalas and showing them a short YouTube clip about them. I then read them the book Koala Lou. They pointed out the different features of koalas, their big ears and nose, grey fur, sharp claws, etc. On the first day every student got a grey piece of paper. They then drew a large oval for the body, and two half circles for the ears. I showed them how to add white paint inside the ears, for the eyes, and some for the mouth. This was left to dry. The next day students cut out their koala shape and glued it onto a dark blue piece of paper. A long strip of brown paper was added for a tree branch and then they cut leaves from green pieces of paper. They also used black paper to cut out a big oval for its nose. On the third day, students were given more grey paper to cut an arm and a leg for the koala. These were glued so that it looks like the koala is holding onto the tree. Finally, a Sharpie marker was used to add the black dot in the eyes, a mouth, and claws.
Native American Dreamcatchers
I've been wanting to do a dreamcatcher lesson for so long. This was my first time teaching it and I'm thrilled with the results. We began the lesson by going over the history of dreamcatchers through a slideshow. They couldn't wait to make their own! Each student got a paper plate to start with. I usually double them up to give them some thickness to make it more sturdy. They were then told to cut out the middle circle very carefully. This is easily done by folding it over and making a slit to start. Next, each student drew 11 dots spaced out around the edge of their paper plate. I demonstrate this first. Then, they use a hole puncher to make a hole where they drew a dot. Make sure they don't draw their dots too close to the edge. I then show them how to label their plates with corresponding numbers on the back. This comes in handy later when we do the inside weaving. Students start to make designs on their plate using a pencil. I make sure to give them a worksheet of Native American symbols to help them along. Once they are done, they trace it in Sharpie. Because I wanted them to look more authentic, we used only neutral and warm colored acrylic paints to fill them in. Students normally need a few days for this part. When they are ready to weave, each student gets a piece of brown string. The first end of the string is put into the hole marked 1 and taped off. They then loop the string through the numbers in the correct order and then its taped off at the last number. I let them watch me do one first before they start. Three more hole punches are made close together on the outside edge and this is where we tie 3 longer pieces of brown string. 3 beads and one feather is tied to the bottom on each brown string. A lot of students struggle with this part so it requires a lot of patience! This project took a couple of weeks but they were so proud of their work by the end!
Christmas Tree Forests
Kindergarten and 1st graders created these Christmas tree forests right before Christmas break. We started by painting a snowy ground on a blue piece of paper and then used cue tips to make snow falling from the sky. The next day was used to mod podge different shades of green tissue paper to a half sheet of white paper. The last day was used to cut out long triangles from the green paper, and glue down to our background. Short brown rectangles were added for the tree trunks. This makes for a simple and beautiful winter project their parents are sure to frame!
Ted Harrison Canadian Landscapes
Students learned about one of my favorite artists, Ted Harrison. He was a Canadian artist well known for his Canadian landscapes. We read the book A Brush Full of Colour and looked at how he depicted land and sea and how he used vibrant neon colors. Students worked on a large sheet of paper and got to choose between a number of different landscapes inspired by the artist to draw. I also provided stencils of Canadian animals to include if they wished. Students used neon colors to paint in their landscape any way they wanted.
Artist Self Portraits
This became one of my new favorite lessons to teach. I might just do it every year from now on for Kindergarten. What better way to make them feel like genuine artists then to draw themselves as one! We talked about what a self portrait is and then did a full body exercise for the students to become aware of the parts of us we have to draw. For example, we began by standing beside our seats straight and tall and touched the top of our head. We then touched our ears and felt down to our neck. We noticed how our shoulders come out from our necks and how our arms hang down past our hips. We patted our thighs with our hands to notice their length and then touched our knees and touched our toes to point out how long our legs are. I then passed out paper and demonstrated how to start drawing a face and body for our self portrait. Students added the extra details such as their face and outfit themselves. I traced their self portrait drawings in Sharpie and the next week they colored them in. The next part of their project was to make a mini easel out of popsicle sticks and to draw and paint a tiny picture to put on top. They used their favorite color as the background.
Toco Toucans
2nd graders are currently studying South America so of course I had to do a lesson on toucans! We talked more specifically about the Toco toucan and where it lives, what it eats, and what makes it so unique. I demonstrated how to draw the toucans step by step along with a branch and leaves surrounding them. Students loved adding fun details to their rainforests. These were colored in with oil pastels and the background was painted blue.
Paul Klee Castles
Students learned about the artist Paul Klee and Cubism for this project. We studied a few of his works but talked more in depth about the shapes and colors we saw in his Castle and Sun painting. Students were asked to draw their own castle design on orange paper. The castle would then be filled in with different shapes and colored in neatly. The results are so fun and colorful!
Tuesday, November 8, 2016
William Wegman Dog Parodies
Oh my goodness. This lesson was amazing. Students were not only engaged but having so much fun! We learned about the famous photographer William Wegman who captured his dogs in interesting ways. Sometimes he would dress them up as humans, have them pose with a prop, or shoot videos of them that were aired on shows such as Sesame Street. I showed them several example of photographs and videos while the kids smiled, laughed or pointed out how unique the artist's thinking was. Their goal for this project was to place a dog in an unusual or comical situation, creating a parody. We spent the first day simply cutting out as many dog heads as we could find in magazines. These would all be put into a huge pile for everyone to pick from. The dog heads had to be medium to large to work well for the project. The next day was used for the students to brainstorm and sketch out their idea. They were allowed to use 2 dog heads in their picture if they wanted. Once their sketch was approved by me, they could pick out their dog heads, glue them on their paper, and start drawing the scene around it. Their ideas impressed me and they made for such a great hallway display.
Pete the Cat
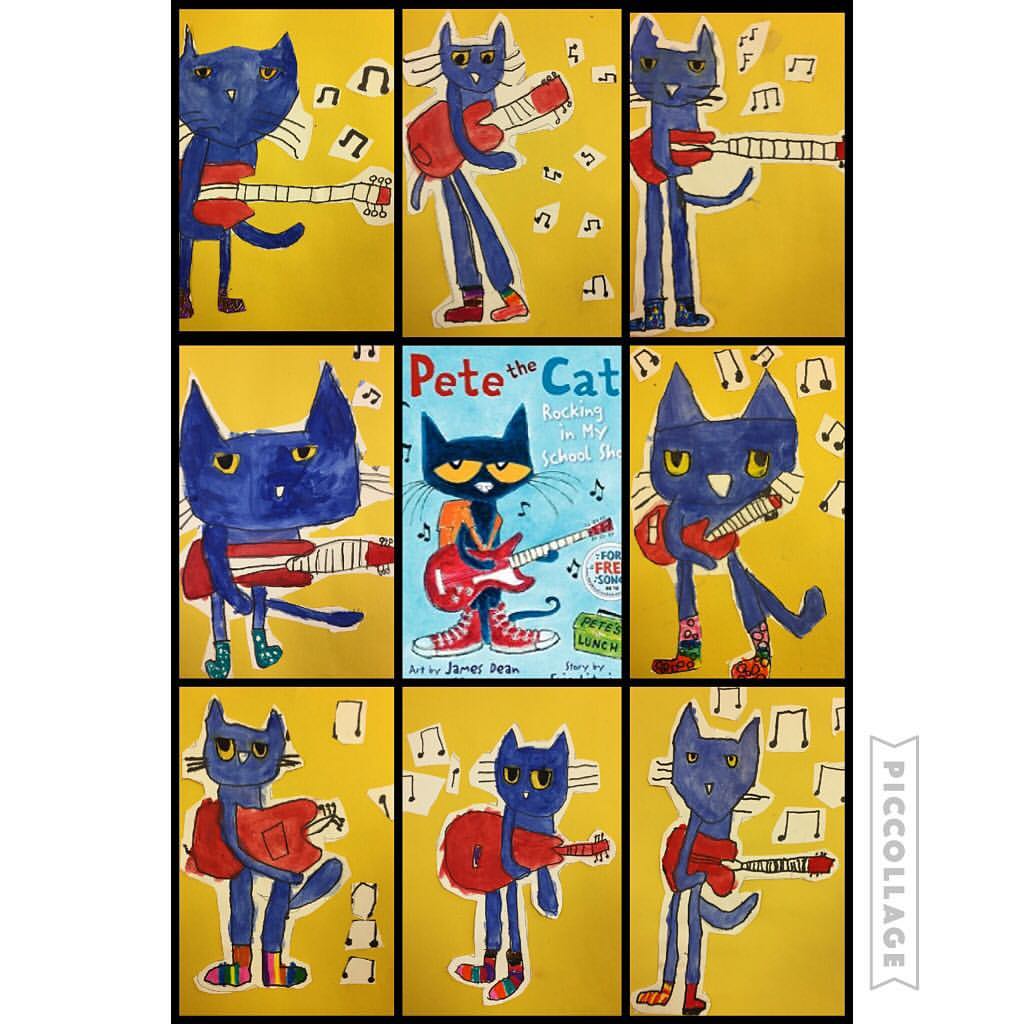
I started the beginning of the year with Kindergarten by doing a project based off a book they already know and love. We read the book and sang the song and talked about what colors make up Pete the Cat. I was able to work in the primary colors this way because of course his body is blue, his eyes are yellow, and his guitar and shoes are red! Yay! This made it easy for them remember the colors :) I did a step by step demonstration of how to draw Pete, students painted him in, cut him out and then glued him onto a yellow piece of background paper. Fun little music notes were added for detail.
African Kente Cloth
This year our school is going global which means each grade level is assigned a part of the world to study. Because of this, I will be teaching as many multicultural lessons as I can. I'm loving this opportunity to grow and expand my art knowledge. Since 3rd grade is studying Africa, I decided to start with a fun weaving lesson. Kente Cloth originated in Ghana and is known for it's elaborate pattern and colors. Kente cloth is worn for celebrations such as weddings, graduations, ceremonies, etc. and can tell a story by its colors. We talked about what each color represents in their culture and then students brainstormed what colors they would choose to represent them as an individual. This is the list of meanings I provided them with:
Red/Orange: Strength
Grey: Healing & cleansing
Black: Maturity
Gold: Wealth & success
Pink: Gentle & sweet
Purple: Protective of others
Blue: Love & harmony
Yellow: Beautiful & royalty
Green: Growth & nature
White: Purity & healing
We used several days weaving different colored paper strips. Some colors were added on top of others for pattern. Once completed, students turned it over to the back and taped up the sides to hold it all together. Small pieces of black string were added to the ends for a cloth like appeal.
Name Skeletons
I saw this project on the Pinterest and decided to give it a go. Let me start out by saying, it was very challenging for some students. Luckily, with a lot of one on one help, we got it all done! We talked about symmetry for this lesson as well as positive and negative space. To create symmetry for the skeleton's ribcage, students had to write their name in bubble letter-cursive on a folded sheet of paper. I gave them cursive alphabet sheets as a guide and we spent a good 2 days getting this part done. Students struggled with writing their letters too skinny of small so I really had to emphasize that these were to be thick bones for our skeleton. The next job was to cut out their name with the paper still folded, so that would have two pieces. Again, this was very tricky for some because it was such intricate cutting work. I had to help some kids cut the circles out from some of their letters. They then glued down both their names in the center of a big black sheet of paper, making sure that the same letter was touching. Some names are read from the top to bottom and some read from the bottom up. The last class period was used to cut out the skull, arms, legs, hands and feet. Some students opted for the mitten hands and some took it a step farther and made individual fingers. I know the kids were relieved to be done but extremely proud of their work.
Frankenstein Monsters
What better way to celebrate Halloween then to make Frankensteins in art class? The little one's definitely enjoyed making these. I found a kid friendly story and video on Frankenstein for the kids to watch on YouTube and then we talked about the different shapes that make up his face. To start their collage, they chose a shade of green for their monster as well as an orange or purple paper for the background. The rest of the details were added with scrap paper and Sharpie. The results are mighty scary...and cute!
Friday, July 29, 2016
House Weavings
This was the weaving lesson I chose to do with the small ones this year. The first day of the lesson was used to make the paper background. They picked a color blue for the sky and a shade of green for the grass. They then added a sun and clouds to they sky. The following day was used to make the actual house weaving. I let them choose two different colors and demonstrated slowly how to weave the strips. It always seems that half the kids get it right away and the other half struggle a lot. I always have the kids who understand it really well to help the ones who need it. Once they completed their weaving they got to add a roof, door, and windows. I will definitely be repeating this lesson in the future! They are so adorable :)
Thursday, July 28, 2016
Van Gogh Sunflowers
For this lesson I read Camille and the Sunflowers to the students and showed them a PowerPoint on Vincent Van Gogh. The kids loved his paintings and were sad to hear that he only sold one during his lifetime. We learned about why he chose to paint so many sunflowers at one point in his life and what they represented. The students got a sunflower worksheet along with a pair of dice and used these to complete their drawing. Each number rolled represented a different sunflower or vase shape/design. Gold and yellow paints were used for the sunflowers and neutral colors for the vase. Once dry, they outlined in black crayon. Unfortunately, we ran out of time in the school year for them to sign their names on the vase like Van Gogh did, but I encouraged them to do it once they took it home.
Blowing Kisses on Mother's Day
Okay so this project was inspired by something similar I saw online. Can't remember where I saw it but I changed it a bit and tried it out with my little ones. Mother's Day was coming up and I wanted the students to have something really sentimental to give to their wonderful mommies! I took a photo of each Kindergarten and 1st grader blowing a kiss to the side. This was harder for some kids to do than others but we made it happen, haha. I printed them out in black and white relatively small and glued them in the bottom corner of a white piece of paper. This was a lot of prep time on my part but so worth it. On the first day of this project we talked about why we love our moms, what they do for us, and what we wanted to say to them on Mother's Day that would make them smile really big. Then we used oil pastels to draw hearts coming from our lips and hands to represent our 'kisses.' Red, pink and purple liquid watercolors to make a splashy background. While it was still wet, we used glue and glitter to make it ever more special. Having the kids pinch and sprinkle over a bucket didn't cause too bad of a mess luckily. The next day was used to add special messages to our mom. I printed out some of the most popular phrases I heard from the kids and they chose one to glue onto their paper.
Watermelon Self Portraits
For one of the last projects of the school year I thought it would be fun if the 2nd and 3rd graders did a self portrait eating a watermelon. We drew the picture together step by step and then they were encouraged to tweak it to make it look more like them. Students could add freckles, design their shirt, add jewelry, freckles and whatever else they could think of to make it unique. Oil pastels were used for coloring and the background was painted. A few also chose to add strips of picnic blanket patterned ribbon on the edges. The other half of this project was for them to write a picnic short story. These were stapled to the back of their work and each student presented to their class. I loved hearing their stories of what they packed for their picnic and the woodland animals they shared it with!
Corduroy Bears
One of my favorite childhood stories was definitely about Corduroy the bear. I was surprised to learn only a few kids recognized the book! Once I read it to them, they loved it as much as I did :) We created our own Corduroy bears showing different kinds of texture. We used gold paint for the bear and green construction paper for the overalls. Each student got a small piece of cardboard to dip into a darker green paint to make a corduroy effect on the overalls. We also used gold oil pastels to add fur around the outside of our bear. Students picked out a color for the background as well as 2 buttons for me to hot glue on their picture. I love the results!
Growing Vegetables
I thought Spring would be the perfect time for a vegetable garden themed project! 2nd and 3rd graders learned about several different vegetables, their physical attributes and tips for planting each. It helps to bring in an example of each vegetable for the students to pass around and study. Their artwork shows what the vegetable looks from above and below the ground, which I think is pretty darn cool. We talked about how their greenery is what clues us in on what's growing beneath; they all have unique qualities. The vegetables were drawn in pencil, and then oil pastels were used to outline in specific colors. Paint was used to fill it in.
Tuesday, March 22, 2016
Rainforest Snakes
2nd and 3rd graders got to explore the rainforest for this lesson. We learned interesting facts about the rainforest while studying the bountiful plant and animal life that subsides there. I chose to have the students draw rainforest snakes wrapping around a tree. I love the look of this project and was anxious to teach them how. Make sure they have their eraser handy, as it requires a lot of trial and error. They enjoyed drawing it step by step and learning what parts to erase, and what parts of the snake are left in front of the tree. It really shows a lot of depth and they loved how realistic their pictures were becoming. I let them draw their own pattern on the snake but suggested stripes or spots. I then wrote a few common snake color combinations on the board for them to choose from. I told them that if they wanted their snakes to continue looking realistic, that pink or purple isn't going to do lol Large rainforest plants and flowers were added on the sides of the paper and a background color was painted. I love that some actually included rain drops!
Subscribe to:
Posts (Atom)